Are you tired of dealing with a malfunctioning phone charging port? Before you consider visiting a repair shop, try diagnosing and fixing the issue yourself. This guide will walk you through the steps to identify and potentially repair your phone’s charging port at home.
Start by trying different charging cables and adapters to rule out any issues with your current setup. If the problem persists, it’s likely related to your phone’s charging port. You can attempt to clean the port using a small brush or a cotton swab, removing any debris that might be causing the issue. Also, performing a phone reset can sometimes resolve connectivity problems.
By following these steps, you can potentially resolve common charging port issues without needing professional help. This DIY approach can save you time and money, getting your phone up and running in no time.
Understanding Smartphone Charging Port Problems
It’s key to know why your phone’s charging port might not work right. Many things can go wrong, like water damage, dust, or just wear and tear. Even loose connections or bad charging habits can cause problems.
Common Signs of Charging Port Damage
Spotting damage in your charging port is important. Look out for these signs:
- Your phone not charging properly or at all
- Slow charging or intermittent charging issues
- Loose connections or a loose charging port
- Visible debris or corrosion inside the charging port
- Damage to the charging port’s pins or contacts
If you see any of these, your charging port might be damaged and needs fixing.
How Charging Ports Deteriorate Over Time
Charging ports can wear out for several reasons. For example:
- Frequent plugging and unplugging of charging cables
- Exposure to water or moisture
- Accumulation of dust and debris
- Physical stress or damage to the port
As your charging port gets worse, it might charge slower or not at all.
The Cost of Professional Repairs vs. DIY Solutions
When your charging port breaks, you have two choices: get it fixed by a pro or try it yourself. Professional fixes are easy but can cost a lot. DIY options are cheaper, with many guides and kits online.
Knowing why your charging port might fail and fixing it early can save you money. It also helps your phone last longer.
Essential Tools for DIY Charging Port Repair
To fix your phone’s charging port, you’ll need some key tools. These tools make the repair easier and faster. Whether it’s a usb-c port repair or an iphone lightning port fix, the right tools are essential.
Basic Tools Every Phone Owner Should Have
First, gather the basic tools you’ll need. These include:
- A precision screwdriver set to remove the phone’s outer casing and access the charging port.
- Compressed air to clean out dust and debris from the charging port.
- A soft-bristled toothbrush to gently brush away any stubborn particles.
- An extra charger to test the charging port after repair.
Advanced Tools for Deeper Repairs
For more complex repairs, like charging port replacement, you’ll need advanced tools. These include:
- A soldering gun to repair or replace damaged connections within the charging port.
- A multimeter to diagnose electrical issues.
- A rework station for more detailed soldering tasks.
Where to Purchase Quality Repair Tools in 2025
Finding the right tools is as important as knowing how to use them. In 2025, you can buy quality repair tools from:
- Online marketplaces like Amazon or eBay.
- Specialized electronics stores.
- Manufacturer’s websites for brand-specific tools.
Having the right tools for the job will make your DIY charging port repair more successful and less stressful.
Safety Precautions Before You Begin
Before you start fixing your phone’s charging port, it’s important to be safe. Repairing this part can be tricky. Without the right steps, you might damage your phone or even hurt yourself.
Protecting Your Phone’s Internal Components
When you try to fix charging port smartphone problems, keep the inside safe. Static electricity can harm your phone’s parts. Make sure you’re grounded before you begin. You can do this by touching metal or wearing an anti-static wrist strap.
Don’t use water or harsh cleaners on the charging port. These can cause corrosion or damage. Instead, use a soft brush or compressed air to remove debris gently.
| Precaution | Description | Benefit |
|---|---|---|
| Grounding | Touch a metal object or wear an anti-static wrist strap | Prevents static electricity damage |
| Dry Cleaning | Use a soft brush or compressed air | Avoids corrosion and internal damage |
Personal Safety Measures
When you do a DIY port cleaning or repair, your safety is key. Work in a bright area to avoid eye strain and miss small parts. Use tools carefully to avoid injuries. Avoid sharp objects near sensitive areas.
For more detailed guidance on safely repairing your device, you can refer to resources like Samsung’s self-repair guide. It offers step-by-step instructions and safety tips.
Backing Up Your Data First
Before you start any repair, back up your data. This keeps your important information safe, in case something goes wrong. Use cloud services or connect your phone to a computer to back up your data well.
By following these precautions, you can reduce risks when fix charging port smartphone. This makes the repair process smoother.
How to Diagnose Your Specific Charging Port Issue
It’s important to know if your charging port problem is from software or hardware. This helps you fix it right, whether it’s a simple update or a bigger repair.
Software vs. Hardware Problems
Charging issues can often be software problems. For example, a bug in the system or a faulty driver can stop your phone from charging. On the other hand, hardware issues usually come from damage or wear on the charging port.
To see if it’s a software problem, try restarting your phone or updating it. If it doesn’t work, it might be a hardware issue.
Testing Methods to Pinpoint the Issue
There are ways to find out what’s wrong with your charging port. First, try a different charging cable and adapter to see if the problem is with your current ones. If your phone charges fine with a different one, the issue is with the original.
Then, check and clean your charging port. Dirt and dust can block charging. Use a soft brush or compressed air to clean it. If it doesn’t charge after cleaning, the problem might be more serious.
| Testing Method | Purpose | Action if Issue Resolved |
|---|---|---|
| Try a different charging cable | Rule out cable issues | Replace the original cable |
| Clean the charging port | Remove debris causing poor connection | No further action needed if charging properly |
| Restart your phone | Resolve software glitches | Check for software updates |
Using Diagnostic Apps in 2025
In 2025, diagnostic apps have gotten better, giving detailed info on your phone’s hardware and software. Apps like USB Tool or Device Diagnostics can spot problems with your charging port, battery, or circuitry.

By using these methods, you can find out what’s wrong with your charging port and fix it.
Step-by-Step Guide to Clean Phone Charging Port
A dirty charging port can cause big problems. But cleaning it is easy to do yourself. Your phone’s charging port gets dusty and clogged with debris, which can stop it from charging right. Cleaning it regularly keeps your phone working well and lasts longer.
Gentle Cleaning Techniques
To clean your phone’s charging port, you’ll need a few simple tools. You’ll need compressed air, a small toothbrush, or a soft cloth. First, turn off your phone and use compressed air to blow out any loose debris.
- Use compressed air to blow out loose particles.
- Gently brush the inside of the port with a small toothbrush.
- Wipe the exterior with a soft cloth.
Dealing with Stubborn Debris
If gentle cleaning doesn’t get rid of all the debris, you might need to do more. For tough debris, use a toothpick or small pin to carefully remove it. But be careful not to hurt the inside parts.
- Inspect the port carefully to identify stubborn debris.
- Use a toothpick or small pin to gently remove the debris.
- Reinspect and clean the port again with compressed air.
How Often to Clean Your Charging Port
It’s a good idea to clean your phone’s charging port every few months. Or clean it whenever you have charging problems. Regular cleaning stops issues and makes sure your phone charges well.
- Clean the port every 2-3 months as a maintenance routine.
- Check and clean the port if you notice charging issues.
By following these steps, you can keep your phone’s charging port clean and working right. This ensures your phone charges well and works its best.
How to Fix Charging Port Smartphone Issues
A faulty charging port can be frustrating. But, with a few simple steps, you can fix it. This guide will help you fix your smartphone’s charging port, whether it’s loose, damaged, or has other issues.
Addressing Connection Problems
Connection problems often cause charging port issues. First, check if your charging cable works. Try a different cable to see if the problem is with it. If not, look for debris or corrosion in the charging port.
- Check for dust or lint in the charging port.
- Use a soft brush or compressed air to clean it out.
- Look for any bent or damaged pins in the charging port.
If the connection is loose, you might need to repair or replace the charging port. For small issues, tightening screws or adjusting connectors might help.
Repairing Physical Damage
Physical damage to the charging port can happen from drops or wear and tear. To fix physical damage:
- Open your smartphone carefully to get to the charging port.
- Check for broken or bent pins and try to straighten them if you can.
- If it’s too damaged, consider replacing it with a new one.
For complex repairs, it’s best to get a professional’s help to avoid more damage.

Troubleshooting After Repairs
After fixing the port, test it to make sure it works. Try charging your phone with different cables and chargers. This will help you see if the problem is fixed.
- Watch for overheating or sparks.
- Make sure the charging port holds the charger well.
- If problems continue, get professional help for a detailed check.
By following these steps, you can fix charging port smartphone issues and use your device again without problems.
USB-C Port Repair: Detailed Instructions
Learning to fix your USB-C port can save you money and make your device last longer. These ports are common in today’s smartphones and laptops. They offer fast data transfer and charging. But, they can get damaged or worn out over time.
Common USB-C Port Failures
USB-C ports can fail for many reasons. Some common problems include:
- Physical damage from accidents or rough handling
- Corrosion from moisture
- Wear and tear from frequent use
- Dust and debris inside the port
It’s important to know why the port failed to fix it right.
Fixing Loose Connections
A loose USB-C port can cause issues with charging and data transfer. To fix it:
- Look for any visible damage or debris in the port.
- Clean the port with compressed air or a soft brush.
- If it’s not fixed, check the inside of the port.
- Fixing any loose connections inside might solve the problem.
Caution: Handle the inside parts carefully to avoid more damage.
Replacing Damaged USB-C Ports
If the port can’t be fixed, you’ll need to replace it. Here’s how:
- Buy a new USB-C port that fits your device.
- Take apart your device to get to the damaged port.
- Disconnect the old port from the motherboard carefully.
- Put in the new port and make sure it’s connected well.
- Put your device back together and test the new port.
Note: If you’re not sure about DIY repairs, get professional help to avoid more damage.
iPhone Lightning Port Fix Techniques
When your iPhone’s Lightning port stops working, it can really mess up your day. But, there are easy fixes to get it back to normal. The Lightning port is key for charging and connecting your iPhone. So, when it breaks, it can cause big problems.
Addressing Lightning Port Sensitivity Issues
Lightning port sensitivity can make charging and data transfer tough. Start by cleaning the Lightning port with a soft brush or cotton swab. This helps remove dirt that might be causing the problem.
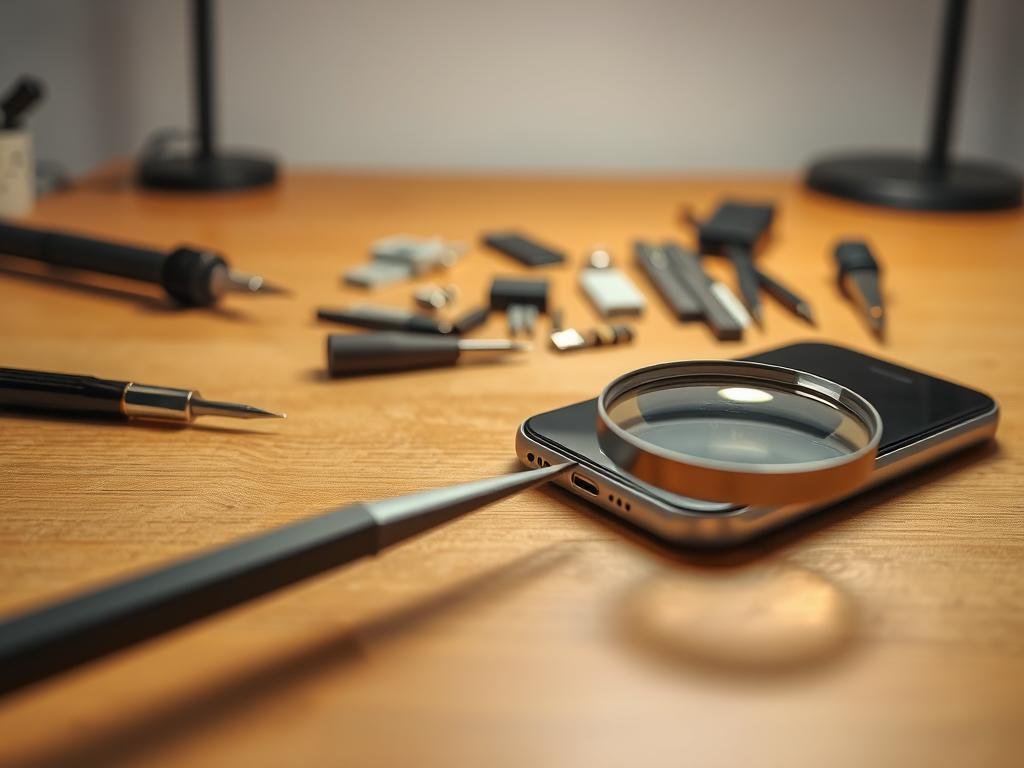
If cleaning doesn’t fix it, check the port for damage or corrosion. A diagnostic light or magnifying glass can show you bent pins or damaged contacts.
Repairing Bent Pins and Contacts
Bent pins and contacts can stop your iPhone from charging. Use fine-tip tweezers to gently straighten them. But, be careful not to push too hard and damage the pin or area around it.
For damaged contacts, you might need a contact repair solution or to replace the Lightning port. It’s important to be careful with these repairs to avoid more damage to your iPhone.
When to Replace the Lightning Port Assembly
If your iPhone’s Lightning port can’t be fixed, you might need to replace the Lightning port assembly. This is needed for serious damage, corrosion, or when the port won’t work no matter what you do.
Replacing the Lightning port assembly needs special skills and tools. If you’re not sure you can do it, it’s best to get help from a professional repair service.
Solutions for Phone Not Charging Properly
Charging problems with your phone can come from many sources. Finding out what’s wrong is the first step to fixing it. Issues like hardware problems, software bugs, or faulty charging accessories can cause trouble.
Addressing Slow Charging Issues
Slow charging can be really annoying, making you late. First, check your charging cable and adapter for damage. Try a different cable or adapter to see if it helps. Also, cleaning your phone’s charging port can speed up charging by removing dust and dirt.
- Check for debris in the charging port
- Use a high-quality charging cable
- Avoid overcharging your phone
Fixing Intermittent Charging Problems
Intermittent charging issues can be really frustrating. They happen without warning. Start by restarting your phone to fix software problems. If it doesn’t work, look at your charging port for damage or corrosion. You might need to repair or replace the charging port if it’s damaged.
- Restart your phone to resolve software glitches
- Inspect the charging port for damage or corrosion
- Consider professional repair if the issue persists
Troubleshooting Battery vs. Port Issues
It’s important to figure out if the problem is with your phone’s battery or charging port. If your phone is old, the battery might be the problem. You might need to replace it by a professional. If the charging port is damaged, you’ll need to get it fixed or replaced.
By checking each part and fixing any problems, you can usually solve charging issues. This will get your phone working right again.
Advanced Charging Port Replacement Techniques
Advanced users can replace charging ports with confidence. They use the right tools and techniques. This includes knowing when to replace, finding quality parts, and following a guide for a successful repair.
When Replacement is Necessary
Not all charging port problems can be fixed with cleaning or small repairs. If your phone’s charging port is too damaged, you need to replace it. Signs you need a new port include constant connection issues, physical damage, or not charging after cleaning.
“Replacing a charging port requires patience and the right tools, but it’s a skill that can save you money and extend the life of your device.”
Sourcing Quality Replacement Parts
Finding the right replacement part is key. Look for parts made for your phone model. Choose reputable suppliers for parts that work well and last long.
- Check online marketplaces for reviews and ratings.
- Consult with professional repair services for recommendations.
- Verify the part number matches your phone’s specifications.
| Supplier | Ratings | Price Range |
|---|---|---|
| Supplier A | 4.5/5 | $10-$20 |
| Supplier B | 4.8/5 | $15-$25 |
| Supplier C | 4.2/5 | $8-$18 |
Step-by-Step Port Replacement Guide
Replacing the charging port has several steps. You’ll need to take apart your phone, remove the old port, and put in a new one. Here’s a simple guide:
- Power off your device and remove the SIM card tray.
- Disassemble the phone according to the manufacturer’s guide.
- Find the charging port and disconnect it from the motherboard.
- Use a soldering gun to remove the old charging port.
- Clean the area and get ready for the new port.
- Solder the new charging port into place.
- Reconnect the port to the motherboard and put your phone back together.

By following these steps and using quality parts, you can replace your phone’s charging port. Be careful with your device’s internal parts to avoid more damage.
Brand-Specific Charging Port Repair Tips
To fix your smartphone’s charging port, knowing your brand and model is key. Each brand has its own design and repair needs.
Samsung Galaxy Charging Port Solutions
Samsung Galaxy phones have complex charging ports. You’ll need precision tools and know the internal parts well.
- Choose a high-quality charging port for the best fit.
- Follow a detailed guide for your Samsung Galaxy model.
Google Pixel Repair Techniques
Google Pixel phones are known for being easier to fix. But, their charging ports need careful attention.
- Use a spudger to open the device safely.
- Use compressed air to clean the charging port first.
OnePlus and Xiaomi Port Fixes
OnePlus and Xiaomi phones face similar repair challenges. Knowing this can help you fix the charging port better.
- Make sure you have the right replacement parts for OnePlus phones.
- Xiaomi phones might need extra steps to disable the battery before repair.
By using these tips, you can fix your smartphone’s charging port. This way, you can use your device without any problems.
Conclusion
Following the steps to diagnose and fix your smartphone’s charging port can save you time and money. It’s important to clean the port properly to keep your device working well.
Regular care, like gentle cleaning and checking the port, can stop problems before they start. If issues persist, going back to this guide can help you find and solve the problem.
For more detailed help on fixing your phone’s charging port, check out HelperTech’s Ultimate Guide. It has lots of tips and troubleshooting advice.
Understanding and fixing charging port issues can make your device last longer and save you from expensive repairs. With the right tools and knowledge, you can handle common problems and keep your phone working great.
FAQ
What are the common signs of charging port damage?
Signs include loose connections and charging that stops and starts. You might also see debris or physical damage.
How do I know if my charging port issue is a software or hardware problem?
Try different cables and check for updates. Use apps to test the port. This can help you figure it out.
What are the essential tools required for DIY charging port repair?
You’ll need a screwdriver, spudger, and tweezers. For more complex jobs, a USB-C cleaning tool and soldering iron are useful.
How do I clean my phone’s charging port?
Use a soft brush or compressed air gently. Avoid sharp objects that could harm the port.
Can I fix a loose USB-C port connection?
Yes, clean the port and adjust its alignment. If it’s too damaged, you might need to replace it.
How do I repair a bent Lightning port pin on my iPhone?
Gently straighten the pin with a small tool. If it’s badly damaged, you might need a new Lightning port.
Why is my phone charging slowly, and how can I fix it?
Slow charging can be due to a dirty port, bad cable, or hardware problems. Try cleaning the port, use a different cable, or update your software.
When should I replace my phone’s charging port?
Replace it if it’s too damaged or if cleaning and troubleshooting don’t work.
Where can I purchase quality replacement parts for my phone’s charging port?
Look for parts at authorized dealers, online, or in specialty electronics stores.
Are there brand-specific charging port repair tips?
Yes, each brand has its own needs. For example, Samsung, Google, OnePlus, and Xiaomi might need special care.
How can I prevent charging port issues in the future?
Clean your port regularly and handle your phone carefully. Avoid using damaged cables to prevent damage.
Is it safe to repair my phone’s charging port at home?
Yes, if you’re careful and use the right tools, you can safely fix your phone’s charging port at home.
